
Creating a remote repository and linking it to a local one_
So, now we know how to work with Git in a local repository. Remote repositories are hosted in the Internet with the help of such services as GitHub or GitLab.
Let’s have a look at GitHub—a collaborative development service. You can create an account, upload your code, and work on different projects together with other users.
First of all, you need to create an account on GitHub, it’s pretty straightforward.
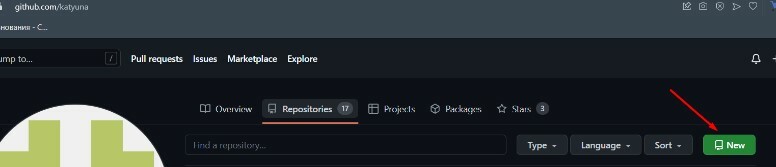
Now you need to create a remote repository. Open the “Repositories” tab and click “New”.
So, now we know how to work with Git in a local repository. Remote repositories are hosted in the Internet with the help of such services as GitHub or GitLab.
Let’s have a look at GitHub—a collaborative development service. You can create an account, upload your code, and work on different projects together with other users.
First of all, you need to create an account on GitHub, it’s pretty straightforward.
Now you need to create a remote repository. Open the “Repositories” tab and click “New”.
A page for creating a new repository opens where you can enter a name for your repository. Mark it as public if you want it to be visible to other users of GitHub. Let’s also check the checkbox to automatically generate the README.md file, in which you can explain how to use your project. See the documentation for more details.
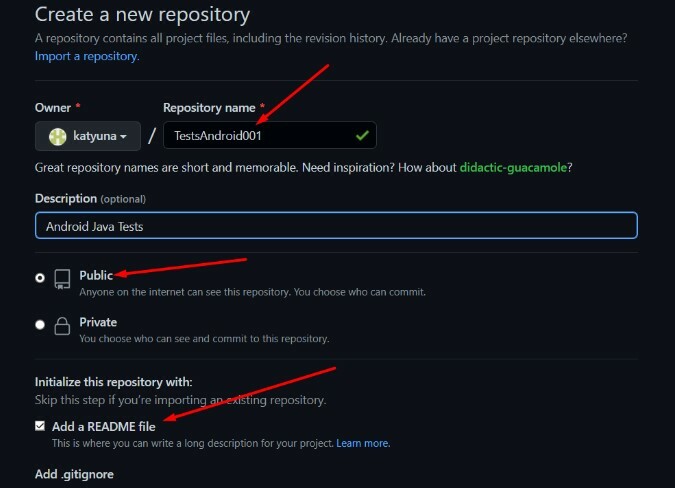
All that’s left is to click “Create repository”. Done! You created a remote repository, but it’s empty for now.
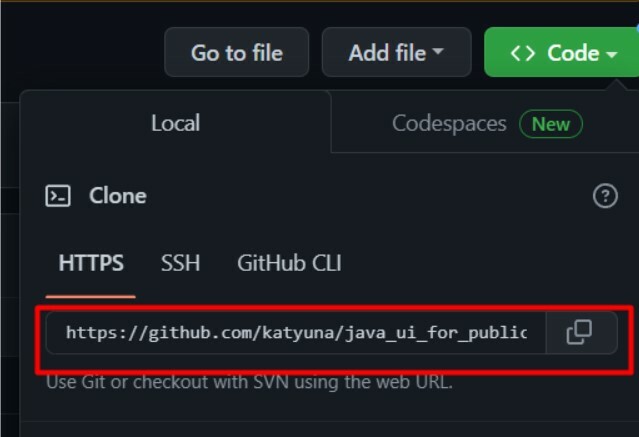
To link a local repository to a remote one, you need a remote repository link, which can be found in the “Code” tab.
To link a local repository to a remote one, you need a remote repository link, which can be found in the “Code” tab.
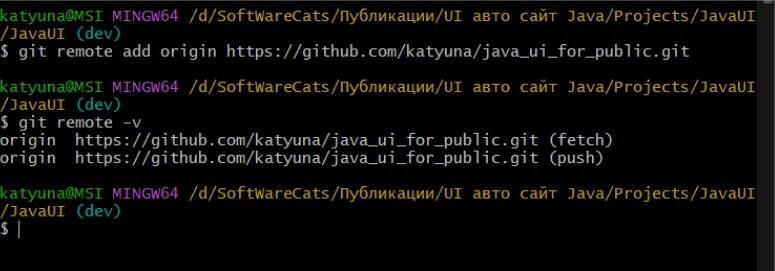
Let’s open the project folder and run Git. Earlier we have already initialized a local repository, made the first commit, and created a separate branch for our tests development. But all this data is still stored locally on your computer. If you want to provide remote access to your project and to make all changes in the remote repository, you need to link the repositories. You can do this by using the “git remote add origin remote_repository_URL” command (where “remote_repository_URL” is a link to your remote repository).
To check if the repositories are properly linked, use the “git remote -v” command.
To check if the repositories are properly linked, use the “git remote -v” command.
Now we need to send files from the local repository to the remote one. It’s done with the “git push” command.
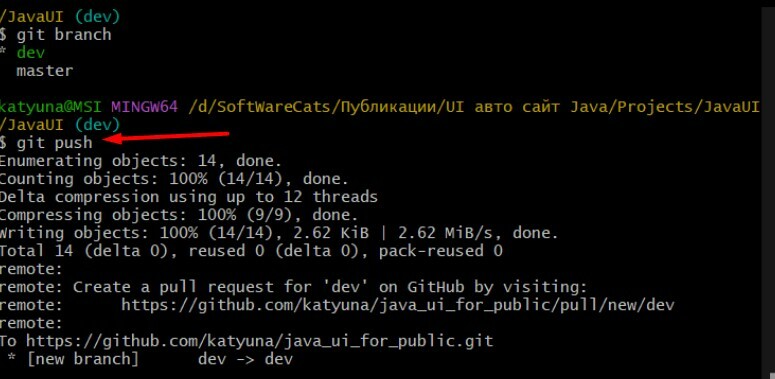
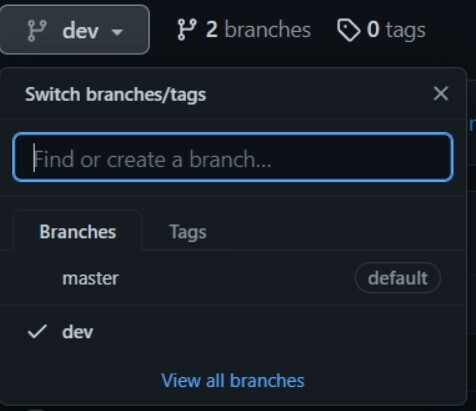
Now we can see our files and project branches in the remote repository.
Let’s open our project in IDEA and go to the “git” tab. If you click “Share Project on GitHub”, IDEA will warn you that the project is already linked to a remote GitHub repository.
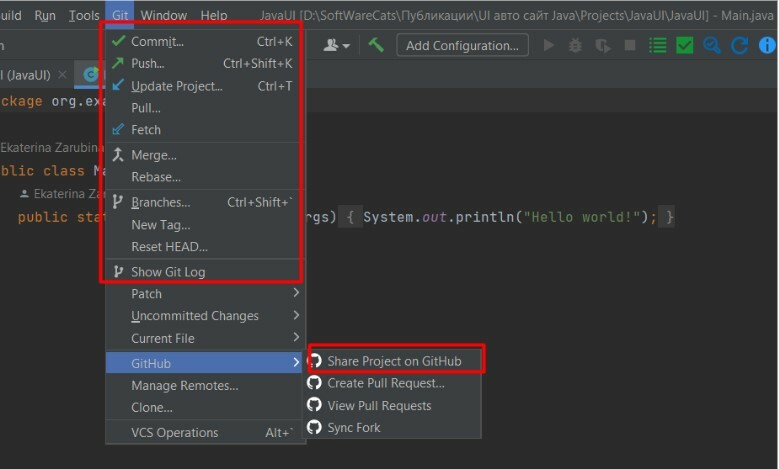
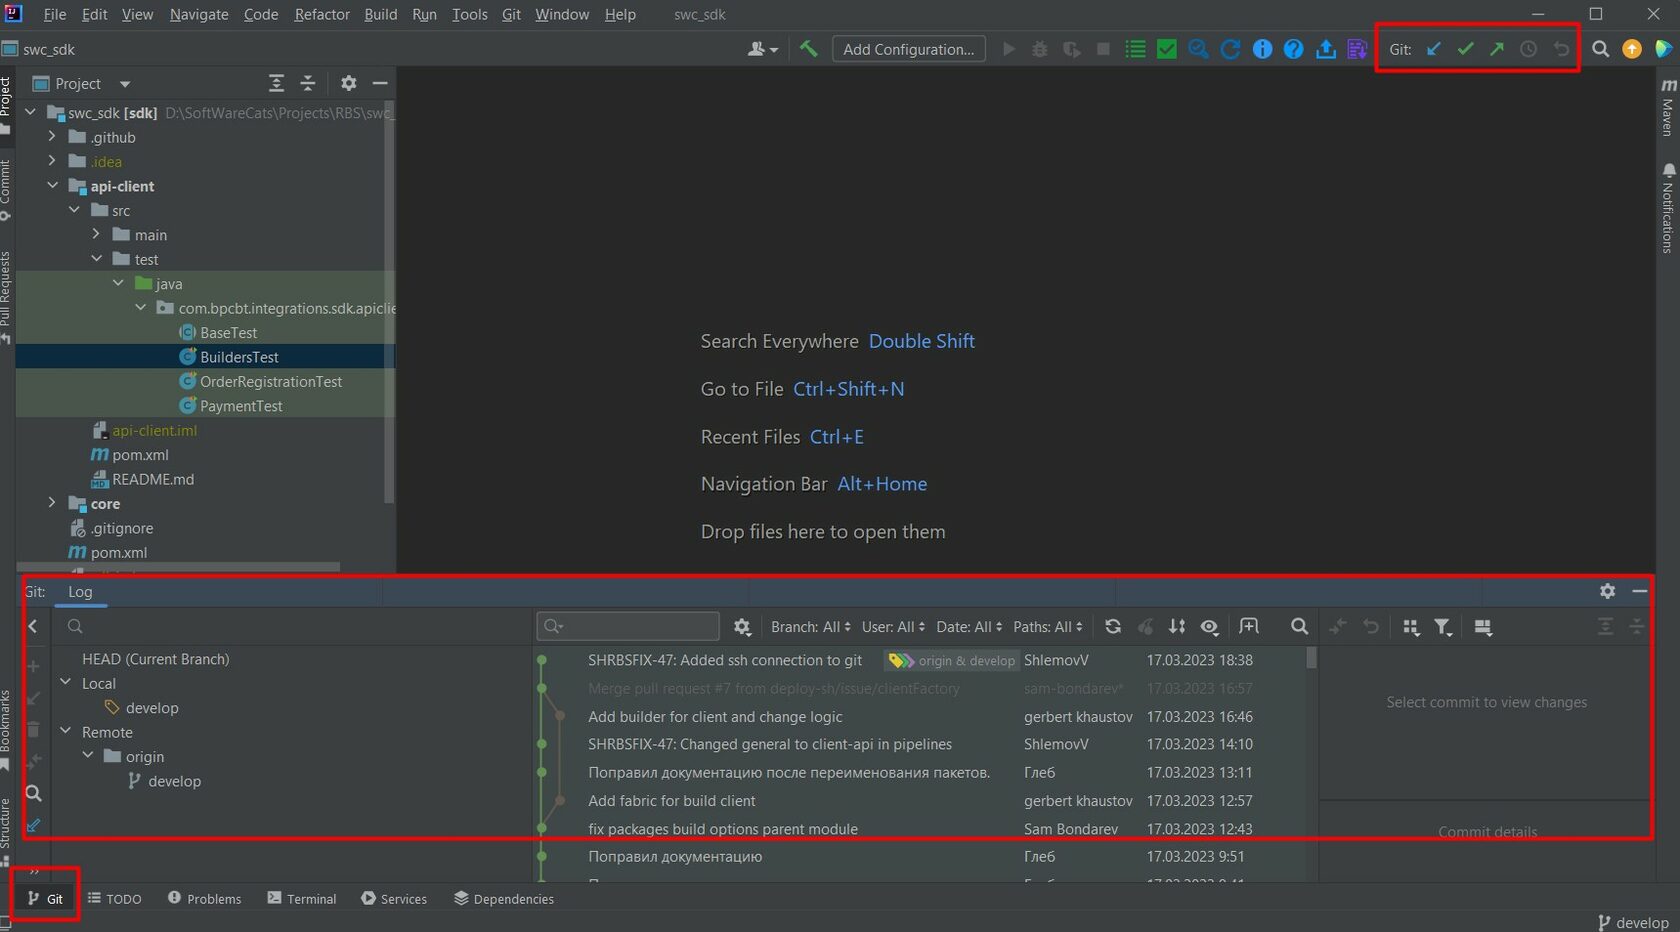
IDEA also allows us to track the project status and use all the basic Git commands directly from IDE.
Another way of creating a local repository is to create a remote repository on GitHub/GitLab first and then copy it from the server using the “git clone” command. See the documentation for more details.
Pull Request_
One doesn't simply uploads code into the master branch. The code must first be approved. That’s when you need a pull request. It’s a request to merge your code with the main code. To make a pull request, you need to open the remote repository, then open the branch which was used for your last push and which needs to be merged with the master branch.
Click “Compare & pull request”, fill in the name and description fields, and click the “Create pull request” button. The owner of the repository will receive your pull request for review. Here you can also discuss the changes and necessary modifications in the “Conversation” tab. After the review your pull request is either approved (and the code is merged into the master branch) or closed without merging.